Stipple texture is a popular drywall finish known for its ability to add character to ceilings while hiding imperfections. First made popular in the mid to late 1900s, stipple texturing became a staple in home design for its ability to enhance visual appeal and mask surface flaws. Whether you’re repairing damaged areas or updating your ceiling’s look, matching an existing stipple pattern can be challenging without the right tools and techniques. A drywall stipple brush is an essential tool to achieve professional results.
What Is Stipple Texture?
Stipple texture refers to a drywall finish created by applying and texturing joint compound or drywall mud. This finish is commonly used on ceilings to enhance visual appeal and mask surface flaws. Stipple patterns come in various designs, ranging from fine textures to deeper, more pronounced patterns, making them a versatile choice for many home improvement projects.
Essential Tools and Materials
To create or match a stipple texture, you’ll need the following:
- Drywall stipple brush (Lobo Tools 8" Horse Hair Drywall Texture Stipple Brush)
- Drywall mud or joint compound
- Mixing tools (e.g., bucket and mixer)
- A roller or brush for applying a base coat
- Protective gear (drop cloths, gloves, etc.)
Preparing Your Drywall Stipple Brush
Step 1: Unpack and Inspect
Before using your stipple brush, carefully remove all packaging, including staples securing the brush to the cardboard backing. Use a pair of pliers to extract the staples, which are there to pre-flatten the bristles during packaging. Removing these staples is essential to ensure the brush performs as intended and does not damage the surface or create inconsistent textures.

Step 2: Condition and Coat the Brush
Conditioning your stipple brush is an important step to achieve an even application. Some people find it helpful to pre-wet the brush by placing it upside down in a bucket of water (bristles facing up) for up to 24 hours before its first use, as this can help condition the bristles and prepare them for texturing. Whether you wet the texture brush before hand or not you MUST coat the bristles with drywall mud before use on ceilings or walls, ensuring the brush is primed and ready to create consistent patterns on the surface. We recommend dabbing the stipple brush against a spare piece of drywall to ensure consistent results.
How to Stipple Texture Drywall
Step 1: Prepare the Ceiling or Wall
Start by cleaning the surface to remove dust and debris. Apply a base coat of drywall mud using a roller or brush for even coverage. Allow the base coat to set slightly, ensuring it remains tacky but not fully dry.
Step 2: Stipple with the Brush
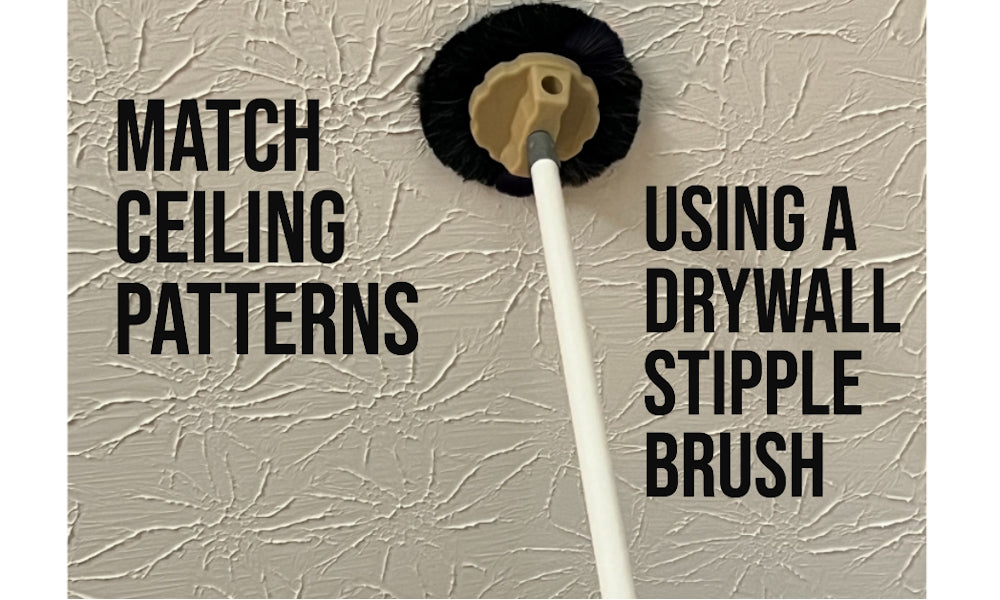
AFTER the brush has been conditioned with drywall mud, hold the stipple brush firmly and press it lightly or firmly onto the surface, depending on the desired texture depth. Use dabbing motions to create fine textures or press more firmly for deeper patterns. You can also lightly dip the brush into the mud if you need to get a more defined stipple pattern. Work systematically to ensure consistent results and avoid overlapping patterns.
Step 3: Blend with Existing Texture
When matching an existing pattern, focus on feathering the edges for seamless blending. Adjust the pressure and reapply drywall mud as needed to achieve the desired effect.
Common Mistakes and How to Avoid Them
- Leaving Staples in Place: Always remove packaging staples to prevent damage to the surface or uneven textures.
- Skipping the Conditioning Process: Pre-wetting the brush or coating the bristles with drywall mud (or both) ensures even application and prevents stiff bristles from creating inconsistent patterns.

Above is a visual comparison of a stipple brush before and after being placed in a bucket of water for 6-24 hours, then leaving it upside down with the bristles facing the sky to dry. This would work well if you need a more defined texture because you would be able to press harder against the ceiling or walls.
- Not Coating the Brush: Properly coating the bristles with mud is essential for consistent results.
- Inconsistent Pressure: Apply even pressure to avoid uneven patterns.
Cleaning and Maintaining Your Stipple Brush
To maintain your stipple brush and ensure its longevity, follow these steps:
- Clean the brush immediately after use with warm water to remove all drywall mud.
- Allow the brush to air dry thoroughly before storing it.
- Store the brush in a dry location to prevent bristle damage or mold growth.
FAQs About Drywall Texture Brushes
- Can stipple brushes be used for wall textures as well? Yes, stipple brushes are versatile and can be used on walls for creating unique textures.
- What types of drywall mud work best for stipple patterns? Lightweight drywall mud is often preferred for its ease of application and versatility.
Conclusion
Proper preparation and technique are key to using a drywall stipple brush effectively. By following these steps, you can confidently match existing patterns or create new ones, achieving professional-quality results. Experiment with different patterns to customize your space and make it uniquely yours.
Lobo Tool Company, established in 2022, is a family-owned business specializing in the drywall industry. Known for their dedication to quality and innovation, Lobo Tool Company designs tools like stipple brushes to help you confidently match or create the drywall textures you need. Their focus on research and collaboration with industry professionals ensures their products are both effective and reliable.